

Wristband prosthesis
Production: MÆNUS
Materials: Vegetable tanned leather, copper, stainless steel
Techniques: Leather cutting, hand stitching, staining and finishing, metal working
Finished: 2022
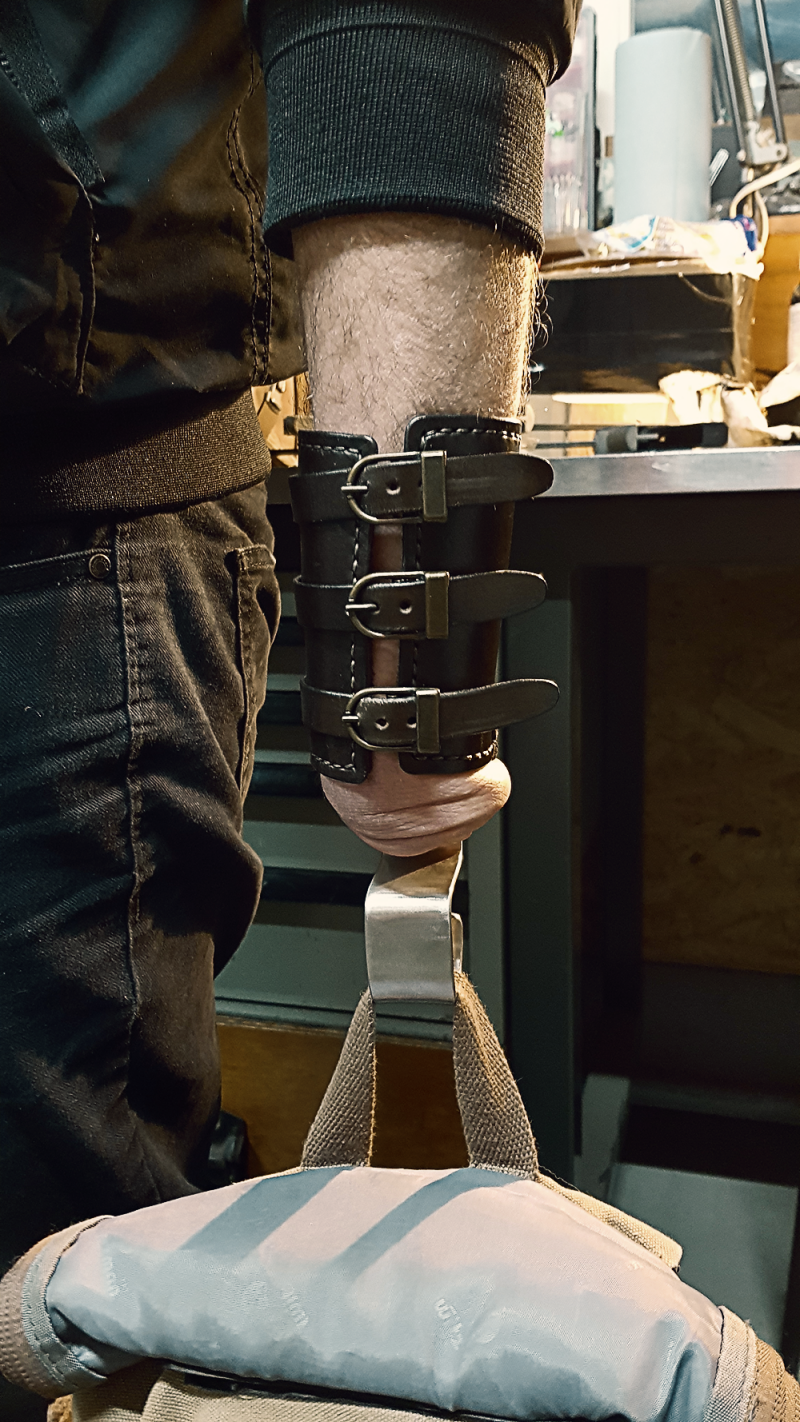
A while back I got asked if I could make a custom leather wristband with the possibility of mounting various attachments to it. The customer was born without a left hand and because of this he often carries bags of groceries or suitcases while they hang in his elbow. This allows him to have his right hand free but due the weight and strain this causes him pain in his neck and shoulder. Of course there is always the option to use a medical prosthesis if you can afford one. However, these are often not very pleasing to the eye, have a very medical appearance and put functionality and ease-of-use before aesthetics. Of course, the most important properties of a prosthesis is functionality and ease-of-use for the end user. But being able to wear a prosthesis without it looking clearly like a medical instrument, being able to take the attachment off so it just looks like a normal leather wristband is very valuable and often something that doesn't get much attention.
Steps taken
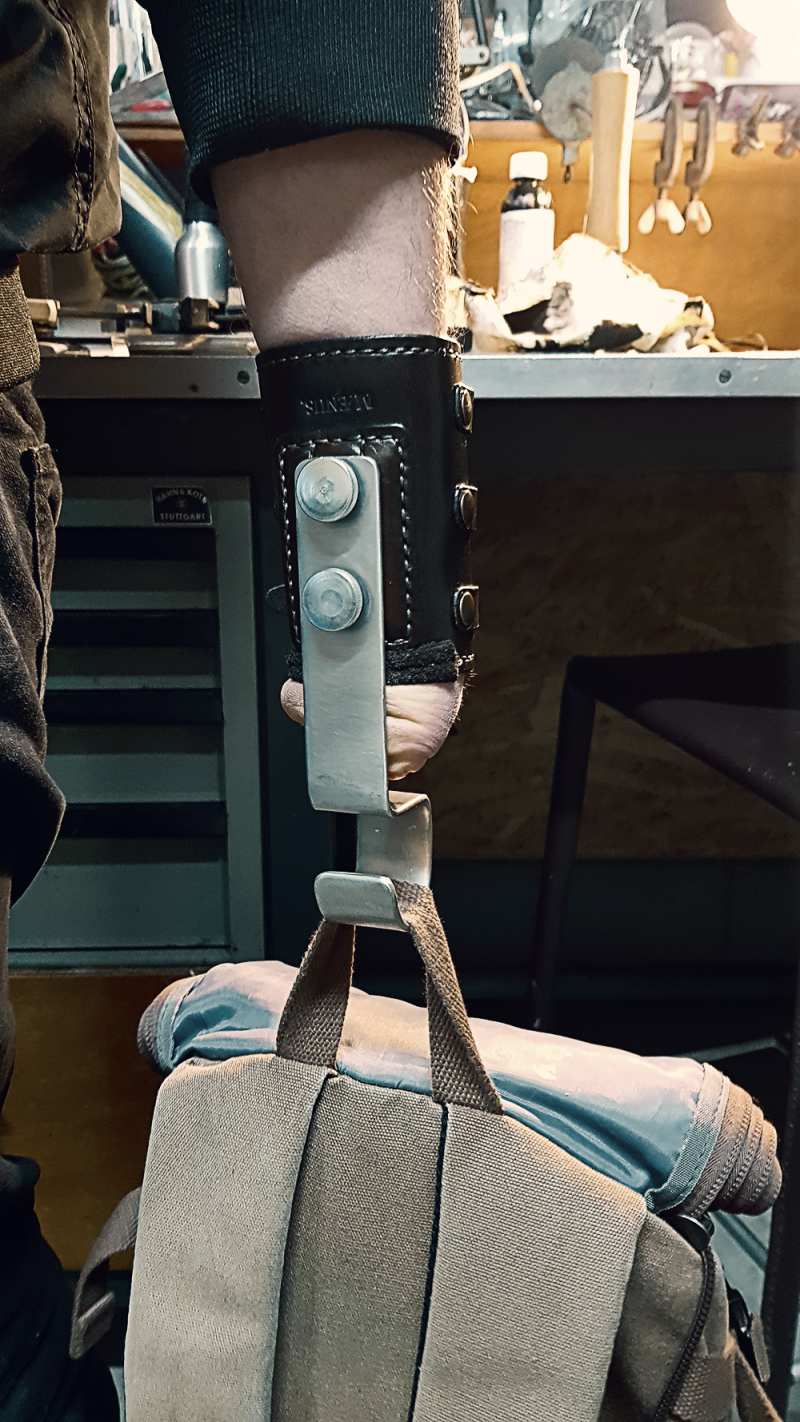
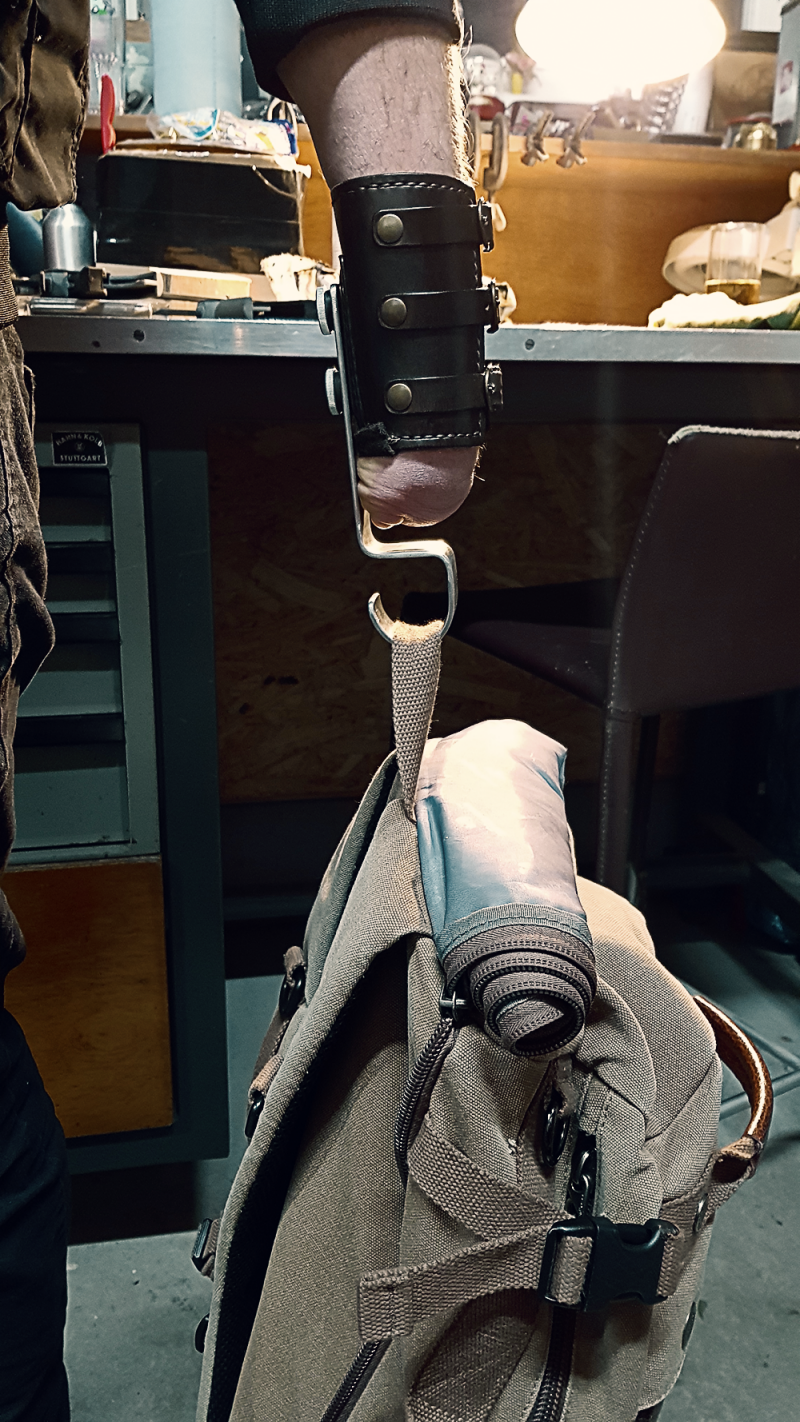
The first step was to measure his left arm, make a template and roughly mark out where all the necessary parts should be mounted onto the wristband. I also did a lot of research, thinking and experimenting on the system that would allow attachments to be mounted solidly onto the wristband. After experimenting with stainless steel I settled on using copper to produce a specifically shaped metal plate which can be sewn into the leather. The copper plate has two M5 threaded holes in it on which various attachments can be mounted.


After this I set out to make the first prototype of the wristband. I cut out a few pieces of unfinished vegetable tanned leather and sewed the copper plate in between two layers of leather. Next to this I made a prototype for a stainless steel attachment plate which can be mounted onto the copper plate using two knurled bolts.


I then organized a fitting session with the customer to check the fit and functionality of the wristband. During this session we decided to change some dimensions of the wristband and to add some padding to protect his wrist which he uses to keep the wristband in place. I also made a temporary hook out of aluminium which would serve as a template for the more sturdy stainless steel hook. The next step was to disassemble the prototype version of the wristband and to produce the final version, taking the decisions from the fitting session into account.
I cut out all the new pieces of vegetable tanned leather, stained them, finished the edges and waterproofed them, locking in the color. I also cut out a piece of dark brown soft leather to function as a lining on the inside of the wristband and to use as extra padding to protect the wrist. And I bent the stainless steel hook to match the aluminium prototype version.


Next I sewed the copper plate into the new finished leather pieces.


I glued the soft leather lining on the inside of the wristband, sewed both pieces together all the way around and created the padded area next to the sewn in copper plate.


After this I mounted the buckles and straps using rivets. I waited with punching holes into the straps until I delivered the wristband in order to ensure an optimal fit


The next steps were to produce a second attachment, a straight piece of stainless steel with the end covered in leather. This can be used to clamp things between his wrist and the attachment, for example to hold a pen, a brush, cutlery or even hold multiple cards while playing a game of cards with his kids!

End result
The final step was to do a final fitting of the wristband and punching the holes into the straps. Here is the end result!


I find it important to make things that are highly useful, so in order for the customer to make optimal use of the wristband I decided to make a custom cloth pouch in which all the parts of the wristband and the attachments fit. This way you can easily keep all the parts together and throw the pouch in a bag when leaving the house.


